
Pornify your pictures with photoshop
So you want to surprise your boyfriend with some naughty nude pictures, you are striking a sexy pose, trying your most seductive look, maybe even bought a sexy outfit. But somehow your pictures never turn out the way you imagined them. You know they are just amateur shots but surely you can do better than this you think. And yes you can… of course with photo shop. No don’t run away yet I’m not talking about altering and reshaping body parts (of course if you want you could) . I’m talking about a few simple retouches that will drasticly increase the porn flavour of your pictures.
I will show you a few easy steps to do this. I will keep the tutorial very basic and will not guide you in your every click and setting in photoshop and I will asume you know your way around in photo shop. I’ll just tell you which photoshop tools and filters to use and which effect they have . if you don’t know what the hell I’m talking about when naming tools/filters then google these names for a more in-depth tutorial regarding the specific tool/filter. This isn’t in any way a tutorial for absolute beginners.
Also I will greatly exaggerate the effects so the difference is easy noticeable, remember not to exaggerate like this when working on you own pictures.
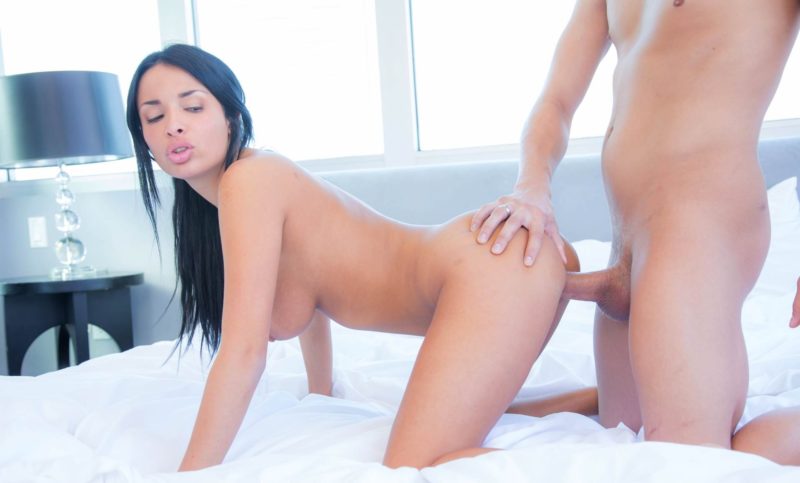
The picture I will be using is this one:

Not too bad for an amateur pic but a lot of room for improvement.
1. Surface Blur
First thing we are gonna do is smoothen out all skin imperfections. yes freckles are cute, but not for this tutorial. Select all skin with your favorite select tool. For me this is quick select in this case. (remember to keep a layer with the original picture so you can always use the erase tool to blend or bring back the original state in particular places of the picture when needed). When you have selected al skin parts use the surface blur filter this will blur your selected skin giving it a nice and smooth look. Remember I’m exaggerating the effect in this tutorial
This is the effect you’ll get. Look at the skin and notice the soft smooth satin look this filter gives. (click images for larger pictures)

2. Diffuse Glow
Now it’s time to add some diffuse glow to your selected skin, this will give the highlight areas of the skin a nice glow creating that movie-poster clay like “cartoonish” effect. Play around with the diffuse glow parameters to get your desired effect. Again I will greatly exaggerate in this example

3. Contrast
Third step is to use some contrast on the skin. You could/should use contrast in the final steps of picture retouching. But to show you the effect I will use it on the skin only now. The contrast will bring out the diffuse glow poster effect even more and give the skin a nice tan-ish look. clearly again greatly exaggerated.

4. Contrast Hair
As you might haved noticed we haven’t payed attention to the girl’s hair. And after the last contrast increase to the skin the hair color seems kind of dull in comparison. Before I used contrast I also applied step 1 (surface blur) and step 2 (diffuse glow) to the hair. But only a small amount of surface blur because you want to keep a little bit of definition in the hair (that’s why I selected only the skin not including hair in the beginning) Diffuse glow accentuates highlights in the hair nicely. But only matching the contrast to the skin could be sufficient.
5. Background
Of course you could leave it like this. 4 simple steps to improve your amateur pictures. But amateur pictures are rarely taken in ecxoticc or beautiful locations. So why not pay attention to the background to make yourself stand out even more. You could cut out your whole body and paste it on a white or black background. when done right it gives a nice effect. But I like to make use of the existing background when possible. For now select and group your skin plus hair and copy if necessary so we can start working with the background without affecting the person in the picture. There are many things to do this time the only thing I did is somewhat matched the contrast to the person and adding a lens blur to the background so you automatically focus on the person in stead of the background. The I applied HDR toning on the whole picture to the person pop out even more
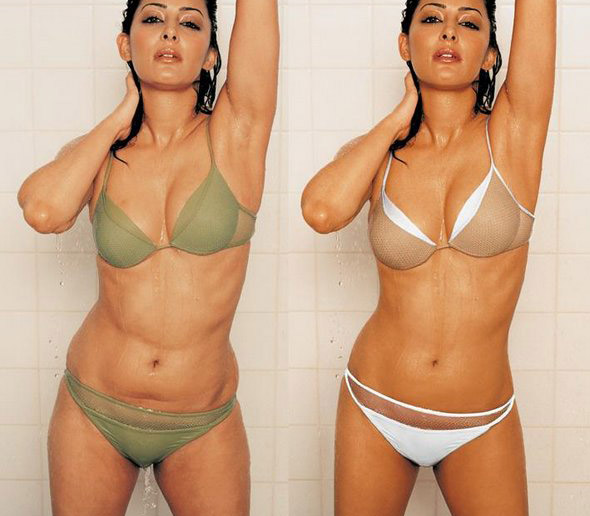
And then you’ll have your final picture looking something like this:


Of course like I mentioned before I greatly exaggerated the applied effects to make them clearly visible. Therefore the end result is way over the top. Fine if that’s what you are looking for but in most cases a clearly photo-shopped pictures is not the preferred end-result .
If This wasn’t an example the outcome would be something like this:

Thats it! Feel free to comment if you have any questions